
Replay: Here's how one filmmaker eschewed the use of Log in favour of lighting to get the result he wanted in camera, by using techniques that were once the preserve of film shooting. This is the making of The Maestro.
I was perhaps amongst the last generation to study film-making with a syllabus that was totally based around analogue film. At the London International Film School in the late 80’s, we never touched a video camera. From day one, we were taught how to work with film cameras, Nagra sound recorders, and film editing benches.
Of course at the time, we all wanted to get on with the ‘artistry’ of film-making, and were frustrated by the endless lectures on the use of the light-meter and the chemistry of film, but of course, like so many things in life, one ends up valuing those lessons from the past.
I shot my first two feature films on Kodak film, with a traditional film edit, neg cut, and film grade - not even a DI.
But the quality, availability and affordability of digital cameras developed very rapidly, and my last three feature projects have all been shot digitally.
Do I miss film? Well, I certainly don’t miss the cost. I don’t miss the calls from the lab in the middle of the night telling me that a reel was scratched, or that there was a problem with the bath and we’d lost footage. I don’t miss worrying in the middle of a take that the mag might run out of film because I’d underestimated the length of the shot.
I miss two things:
I miss the atmosphere that shooting film created on set. Every second that film ran through the camera was dollars being spent, and that usually created a certain discipline and focus on the set.
The other thing I miss is that indefinable quality of the film image that still seems so hard to re-create digitally.
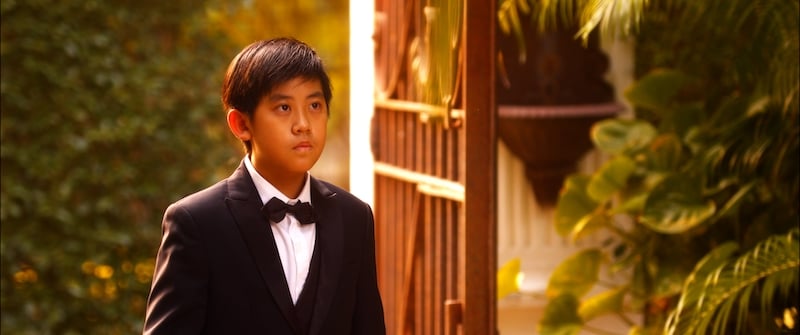
A still from The Maestro. No grading was used on the film and the image comes straight out of the BMPCC 4K used to shoot the film. Image: (c) Titania Pictures 2021.
Making video look more 'film like'
Some of the readers might be old enough to remember the various tricks you used to do to desperately try to make SD video look less like video. You’d throw away half the information by de-interlacing, you’d try to add grain, you’d add a black crop. But of course, you never got even close to the look of film.
My latest film The Maestro is an homage to the days of the B-movies, of Roger Corman and later Charles Band.
It’s a horror film, but not a dark, moody, disturbing horror film. It’s a fun, absurdist adventure, which will hopefully evoke as many laughs as screams.
The producer, Thailand’s most famous classical composer and conductor - Somtow Sucharitkul, agreed with me that in these times of COVID, we wanted to spread a bizarre and mad form of joy, rather than a vision of a bleak and dystopian future.
That decision was clearly going to affect the look.
I wanted it to look like film.
But what does that even mean? Because let’s face it, ‘The Wizard of Oz’, ‘Midnight Cowboy’, ‘The Godfather’ and recent Steve McQeen films like ‘Shame’ have all been shot on film, and they couldn’t look more different.
We wanted to get somewhere between the eighties look of ‘Poltergeist’ and ‘E.T.’ and the 3-strip Technicolor look of something like ‘The Ladykillers’.
The first decision was to wherever possible use traditional techniques.
So we used split diopters, stockings for diffusion, dollies rather than gimbals, and in-camera flashing, as well as some classic lenses including a 25-250 Angenieux.
But how could we get that rich, saturated, look that we wanted? We tried just about every sort of film LUT there is, and nothing seemed to work. I tried creating LUTS of my own, but they still felt somehow artificial. I was sure it must be possible. Digital can compete with film in terms of resolution, shallow depth of field, and even dynamic range. And that’s when I thought back to the hours of exposure lessons at film school with my lecturer Bill Oxley.
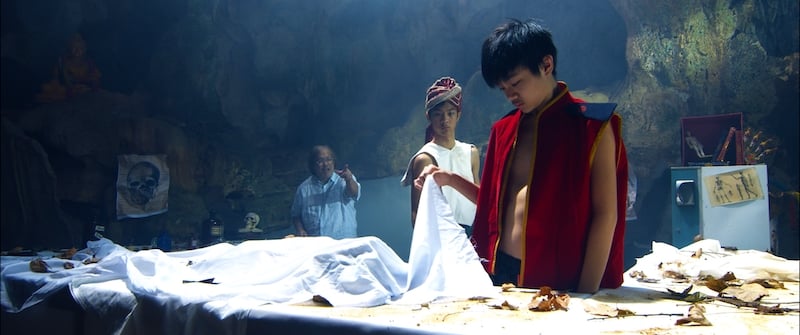
Another grab from The Maestro. Image: (c) Titania Pictures 2021.
Exposure methods and dynamic range realities
We were all issued with a grayscale card. It was segmented into a series of patches from black, through the shades of gray to white. Each patch represented a stop of exposure.
But what I remembered was that there were seven different patches. How could that be? That would imply that film had a dynamic range of only seven stops. And we all know that film has a dynamic range of over 12 stops, don’t we? And so I started to research, and realized that there’s a massive amount of confusion over this.
Here’s my theory as to why:
Film does indeed have a dynamic range of somewhere between 12 and 15 stops. But, by the time it was printed optically to film for screening in the cinemas, or was transferred to REC709 video, that dynamic range was reduced to somewhere around 6-8 stops.
And, most importantly, film grading could not alter the contrast. A film grader could use the extra dynamic range of the film negative to make the whole picture brighter or darker, but without costly chemical or optical processes, they could not reduce or increase contrast.
Think of it as trying to fit a 12 foot ladder into the back of your car, and the space in your car is only 7 feet. You can select a 7-foot section of the ladder, cut it off, and put that in your car, but you can never squeeze the ladder to make it fit into a 7-foot space.
So, when a cinematographer shot film, and used a light meter, he knew that if his light meter was wrong by a stop, the grade could fix it, but the contrast between the lightest part of the scene and the darkest could not be altered.
A cinematographer would put ND gel on windows, add fill light to reduce contrast, and use all his expertise to capture the mood of a scene within the limited dynamic range.
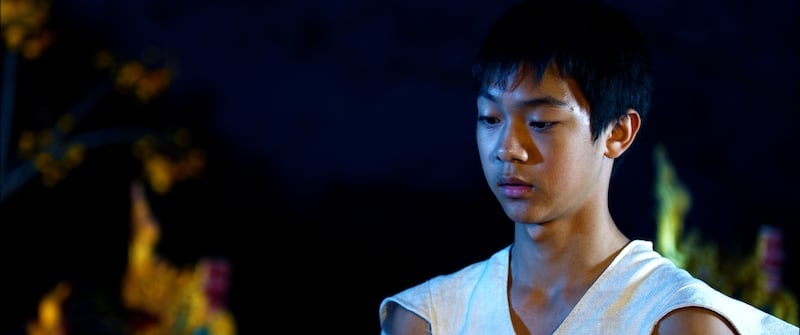
A still from The Maestro. Image: (c) Titania Pictures 2021.
Dynamic range in the digital realm
The massive change came when films started to grade digitally. For the first time, the contrast of an image could be easily changed. If the scene outside a window was ten stops brighter than the shadows inside a room, the colourist could pull the two extremes into the range of the displayed image.
When a new digital camera is launched, the manufacturers will often proudly proclaim the dynamic range - 13 stops, 14 stops, 15 stops...And, as I just explained, that is dynamic range that the cinematographer can really use, rather than just have in his back-pocket as a margin of error. We have false-color displays and histograms to help us ensure that the image we are shooting is within the dynamic range of the sensor.
But, however much dynamic range our cameras are capable of capturing, the color grader is going to have to find a way to squeeze that into an image that looks good on a standard TV or cinema screen.
Of course these vary, but it might surprise you to know that REC-709, which is still the standard for many TVs, was designed for a dynamic range of only 5 stops! Unless you can rely on your viewers watching on an HDR display, most modern televisions can’t display more than 8-9 stops.
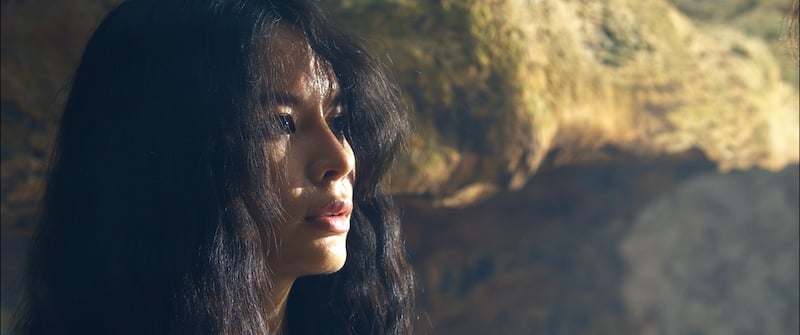
Another shot from The Maestro. Image: (c) Titania Pictures 2021.
Today’s colourists can affect the contrast and gamma of different regions of the image. They can isolate certain tones and areas, and pull the 12-15 stops that you’ve captured into a displayable range.
That, in my humble opinion, is why digital looks different from film. It’s not because of the technology. It’s because cinematographers are not lighting in quite the same way they used to.
They are no longer forced to control the contrast within strict limits. They are not measuring contrast. They’re not filling in the shadows, because they’re within the dynamic range of the sensor. They’re often not ND’ing the windows, because they know the detail can be brought back in the grade.
So, I created a LUT.
I wanted a look more like three-strip technicolor, so I separated the image into the three primary colours, and then sandwiched them back together, I allowed each color to be fully saturated. Then I did one more thing; I altered the contrast of the image to basically throw away around 2-3 stops of dynamic range both in the blacks and in the whites.
Of course, I was not being totally irresponsible - I wasn’t ‘baking’ this LUT into the recorded image, so I knew I could remove it later. But most importantly, it was the LUT that affected the image I saw in the monitor, and that affected all my lighting decisions.
Back to the future
Suddenly, I found that I was lighting like I used to fifteen years ago. I was filling more. I was controlling highlights and shadows. I was using fine grades of CTO and CTB gel to control color balance.
I was trusting the monitor and no longer looking at the histogram. Admittedly, it took a little longer to light. I had to be more precise. A fraction of a stop of change in the iris seemed to make a dramatic difference to the monitor image. It even affected things like the shooting schedule. Bright skies simply burnt out, so we’d often have to shoot early or late in the day (as we used to do more often). And of course, there’s no sense shooting bright saturated colors if all the costumes are subtle shades. So wherever possible, we featured bright colors. It seems like half my life has been spent trying to avoid ugly shadows, but here I was allowing much harder shadows than usual.
I liked what I was seeing.
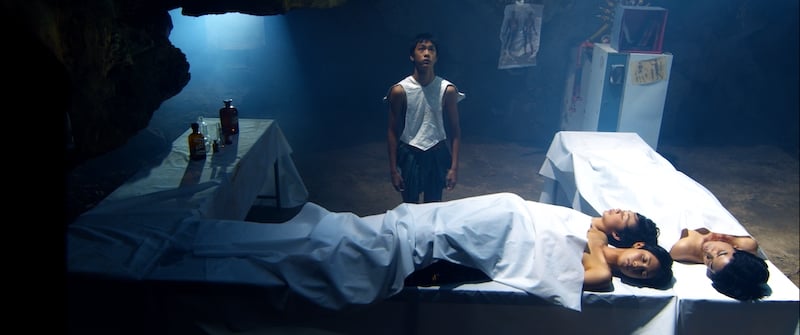 The techniques used occasionally resulted in blown out highlights, but director Paul Spurrier sees such things as imperfections that add character. Image: (c) Titania Pictures 2021.
When ‘The Maestro’ was edited, the footage used the original LUT. And we made a clear, unanimous, but somewhat unusual decision that there would be no color-grade process.
From camera to screen, there has been no grading involved. Shadows might be a little bit too black - whites are sometimes blown out - but it seems to me that it’s those very ‘imperfections’ that make it look more like the films of a previous era.
Every film deserves its own visual style and look, and I may never need this ‘look’ or approach again, but I was happy to be able to commit to a visual style from the very outset, to control the image on set rather than in a grading session, and to be able to return to a lighting approach that I first learned over thirty years ago.
So, I made two conclusions:
Firstly, perhaps digital can come closer to looking like the particular sort of film look that the cinematographer wants. But the secret is not with the cameras or with the grade; the secret is in the lighting.
And secondly, the LUT for a particular look should be used not just in the post-production process, but also in the camera itself (or monitor) as it can radically affect lighting decisions.
Find out more about The Maestro on the official website.
Tags: Production Editor Featured

Comments