Replay: If you are a Linux diehard and you want to run DaVinci Resolve, it is now easier than ever to run the software on different distributions. Here's how to do it.

In past years, the Linux operating system was always reserved to the high-end tech companies or the adventurous. The Linux operating system has evolved into a flexible and user-friendly system. Unlike Windows and macOS, there are many variations of Linux. These range from Ubuntu, Suse and Red Hat to Fedora to name only a few. Some are available free of charge while others will have varying charges depending upon the application.
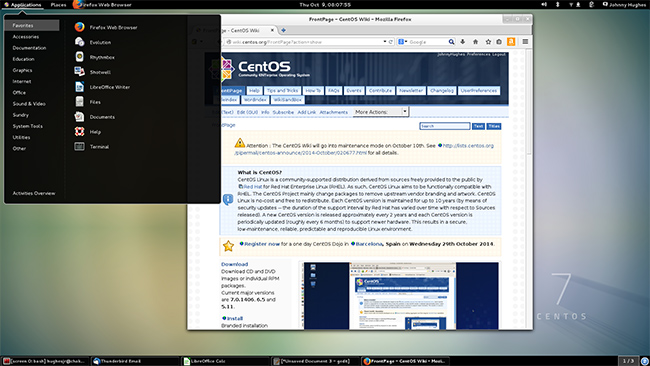
When DaVinci Systems first released the Resolve colour grading system, it was a Linux-only application running on Red Hat Linux. When Resolve was first conceived, it was running on multiple Supermicro workstations linked together in order to assist in processing various tasks. As the years went on, the system footprint decreased significantly. When Blackmagic Design took on the product, the Linux distribution was changed to the open-source version called CentOS. The CentOS Linux distribution has grown into an extremely user-friendly and powerful operating system. For this reason, it’s a fantastic choice for Resolve.
Recently, Blackmagic Design has further developed the Linux version of Resolve to make it easier to install on other Linux distributions. For this purpose, the command-line installer was replaced with a slick installer similar to the one on Windows or macOS. They even went as far as to create a free version of Resolve that could run on Linux.

CentOS is ideal for running DaVinci Resolve
ISO file
What many people don’t know is that Blackmagic created a Linux ISO file that could be used to set up a Linux system. You have to hunt around a little bit, but it’s there and it’s always updated. The easy way to find this is to make your way to the Blackmagic Design Support page on their website. Once there, click on the link for Resolve and all the Resolve versions available for download will be listed. The Resolve Studio version is the paid version and Resolve is the free version. If you select the appropriate version and click on the Linux icon, the Linux version of the application will be downloaded. Once downloaded, you will find a PDF file named Linux Installation Instructions that provides details about the application. If you scroll down to the bottom of this file, the download link can be found. Clicking on this link will download the complete ISO that can be used to install CentOS Linux along with all necessary drivers.
Within the Blackmagic Support page, you will also find a PDF file that is called the Resolve Configuration Guide. When putting together a Resolve system it’s highly recommended to adhere to this guide as it contains extensive system building information. It shows the recommended hardware to use when putting together a system whether it be a Linux, Windows or macOS system. It’s important to point out that when putting together a system, it’s never a good idea to use older hardware as there exists the possibility that the selected hardware is not supported by the current version of the operating system.

Once the Linux ISO file has been downloaded, it should be either burned to a DVD or loaded onto a bootable USB flash drive. You should then boot the computer from either the DVD or the flash drive. It’s also important to note that when the Linux installation starts, everything on the selected system drive will be obliterated, so make sure you have nothing on this drive you would like to retain. Once the installation media starts, you will see a display asking how to proceed. Simply select number 1 next to the “Create a workstation” prompt, to automatically configure a workstation or number 2 to allow manual configuration. Selecting either will start the installation process. During this process, you’ll be asked to create a user account and to set an administration password. Once the installation process has completed, you’ll receive a prompt indicating that the system should be rebooted from the system drive. When first starting the newly built system, it will ask about your local network configuration and then formally end the setup.
Once all this is completed, you’ll have a squeaky clean Linux system that contains Nvidia drivers and even your Desktop Video driver pre-installed. All that remains now is to install Resolve and then we’re ready to go. As we already downloaded the application in order to find the ISO download link, we just need to copy this file over to the Linux computer. Prior to installing the application, it’s also a good idea to keep the Linux Installation Instructions PDF file in a safe place as it provides great information about updating Desktop Video and graphic card drivers. This document also provides valuable information about how to install the Resolve application on your new Linux installation. You have the choice of installing the application with a terminal window open or by using the graphic user interface. Whichever route you take, simply follow the instructions and it will guide you through the installation. As with the Windows and macOS versions of Resolve Studio, licensing is done either by a licence key or a dongle. However, there is a third variation with the Linux version. If you’ve purchased a Resolve Advanced control surface, a special dongle will be supplied. This dongle is labelled Advanced Panel Dongle and it used to be known as the Linux Dongle. The difference when using this dongle is that the provision for ProRes file encoding is now available when using Resolve Studio with your Linux operating system.
Why run Resolve on Linux?
In the end, we have to ask ourselves why would we select to run Resolve on Linux, rather than on Windows or macOS. First off is GPU power. More GPUs may be used with Resolve Studio on Linux than on macOS or Windows. This is mainly because of the number of GPUs available for use is limited by the operating system. Also, Linux is extremely customisable, depending on your requirements. You will also notice that the interface performance is exceptionally good. Another important point is that only the Blackmagic Resolve control panels will work with the Linux version. In the end, if you’re not sure if you want to commit to running on Linux, you can also install the ISO on a secondary drive and use the Linux Grub loader to change between your Windows version and a Linux version of Resolve. The Grub loader is a customisable startup screen that comes with your Linux distribution to select which operating system you would like to start.
Tags: Post & VFX


Comments