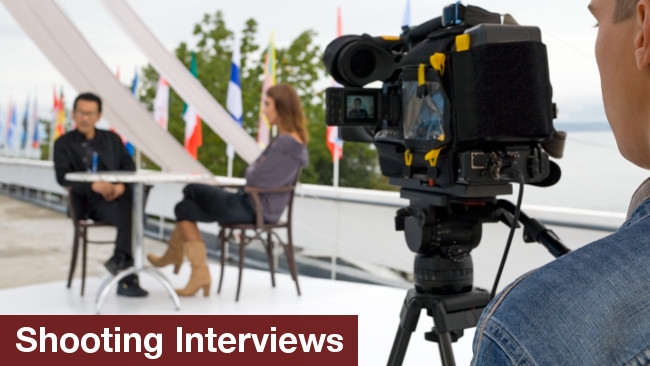
The conclusion of our two-part series on interviews covers production and reveals alternatives to the standard interview.
 Interview graphic by www.shutterstock.com
In the first part of this short series on interviews, I discussed preparation. Now, I'm going to talk about the more practical aspects – these aren't rules, so much as an outline of my experience over many years as cameraman, director and (occasionally) interviewer.
Lighting
I've met directors who insist on shooting interviews by available light, so as to be as unobtrusive as possible, but, nine times out of ten, this will mean a disappointing image. Most interior locations will be bright enough to get an image, but also be annoyingly bland. Offices and homes tend to be top-lit (unattractive eye shadows), lighting sources are mixed (different colour temperatures), the lighting is too flat or too contrasty – all of which can make your interview ugly, unfocused or simply dull.
The setting might look great by available daylight, but relying on it is usually a risk. You might find you can place the subject, say, at the apex of two walls, both with windows that are just out of shot, beautifully cross-lit by soft window light (you might pull the curtains in slightly on one window to allow the other one to become the key). It looks great, but how long is the interview going to go on? How long will the weather conditions stay like that? It's gamble that I've taken a few times and generally won, but occasionally lost. Closing the curtains and lighting the shot may be the safest way to proceed.
Generally speaking, I don't like interviews that look 'lit'; I want them to look great, but natural. Of course, this is a personal preference. Others prefer the gloss and impact of a classically hard-lit interview. As always, I am happiest when I get the look I want with the minimum of lights (one light in the right place is better than any number of lights in the wrong).
Going for a natural look means using a soft light, like a decent size (at least 30cm x 30cm) LED panel light as the key. Notice I said "decent size" LED light, as small LEDs are not soft. Soft (diffuse) light needs to radiate from a large surface area (and the further away the light, the bigger that surface area has to be to stay 'soft'). Also, beware of cheap LEDs with poor colour spectrums (often a green bias that you can never quite grade out). These days, they have gotten a lot better and there are reasonably priced LEDs out there which offer decent colour rendering. Traditional soft lights, like the Rifa or Chimera, and fluorescents, like KinoFlos, also do the job very well. You can, of course, bounce a hard light off a white reflector (classically, a sheet of polystyrene) or through a diffusion frame. However, in small spaces, your light will spill more than a purpose-built soft light and there is a danger that the whole scene becomes too flat (soft lighting should not mean flat lighting).
A subtle backlight (or hair light), from a Dedo or a small soft light, can help to separate subject from background. If it is a domestic night interior, it is often good to have a 'practical' light in shot, like a table lamp, to add some warmth or to simulate it by a light off-camera. If you are shooting a day interior in a ground floor house, it's worth considering putting a light outside (such as an HMI or a blue-gelled 2kw blonde) to simulate a shaft of daylight. If done correctly, this will look perfectly natural and not distract the interviewee.
Another tip (or habit of mine) is to light in line with the face - that is, from where the subject is looking. This models that face better than lighting from the camera position or the other side and, if the light is soft, you may not need any fill. If your subject is wearing glasses, move your soft key more to the side to avoid reflections. If the subject has wrinkles you don't want to emphasise, then move that key more to the front.
Sometimes a more dramatic or stylised look is appropriate. If you are making a doc about espionage or alien invasion, you might want moody low-key lighting. If you are filming a computer hacker, you might want to shoot him as if lit by the glow of a computer monitor. If the subject is a performer, you might want to shoot them backstage or in a studio setting where you can take advantage of the location to make the lighting more theatrical or dramatic. Go too far in this direction and it might seem contrived, but don't be afraid to experiment.
Sound
Forget the camera mic. It's not going to do the job. Ever. The simplest way to record sound for an interview is a personal microphone (also known as a lapel, lavalier, tie or clip mic). They don't have to be radio mics and there is less to go wrong with a cable than a wireless connection. But make sure it is a professional quality mic. There are some very cheap and nasty mics out there. General rule-of-thumb: if a personal mic costs much under £150, it's unlikely to be up to the job.
You can usually hide a personal mic without it being muffled or suffering clothing rustle. But, if in any doubt, it's better to go for a discreet visible mic than poor sound. The Rode PinMic, which pins through clothing into an inconspicuous head on the outside of the garment, is a great way to have an unobtrusive mic and avoid any rustle.
Always have a back-up. Mics go down or pick up mysterious electrical interference. And if your mic has its own power supply, don't forget to carry a spare battery.
The alternative (and better in some ways, but less convenient) is to boom the interview. A short gun mic on a boom stand a couple of feet away from the subject's face might give you a nicer sound. It will also avoid clothing noise and any thumps if the subject hits his or her chest.
Usually, you don't need stereo or the interviewer's questions, so use your two audio channels to record two mono tracks with one few db's lower as a safety track in case the subject shouts, laughs or screams.
Don't forget the buzz track (room tone). This just means recording the ambient sound of the room (using the same mic and settings) without anyone talking. The primary use of the buzz track is to fill the gaps and pauses if you cut up the dialogue; you probably only need a few seconds of it, but try to record as much as you can before people start sneezing or giggling.
Framing
Some like to find one great frame and stick to it; others prefer as much variation as possible. My preference is for no more than three or, at the most, four frame sizes and sticking to them: a wide or medium wide that establishes the character and location and gives room for a caption, then a medium close-up and a close-up for the bulk of the interview, with perhaps a big close-up if things get serious. If there is a break half-way through an answer, reframe to avoid a jump-cut. If I'm shooting, I try to predict where the editor might cut two parts of the interview together and make sure I give her or him different frame sizes. Zooming in gently when things get emotional? Some like that, some hate it.
Some now like to shoot on a larger frame size than they intend to deliver (like 4K for 1080 or 1080 for 720) to enable them to reframe to bridge a cut without loss of quality. Sort of a waste of data, but useful. Which brings us to:
Cutaways
The big problem with interviews is how to paste over the gaps, particularly if you need to cut the subject's hums and stumbles. Even the best interviewee will need to be edited down and, generally, that means changing shot or using cutaways.
Jump cuts in interviews seem more acceptable now. They fit certain abrasive styles of filmmaking, particularly in close-up and if the changes in frame are obvious. Sometimes dissolves or fades between shots can work but, more often that not, we need to cut. If we don't have a change in frame size or a different camera angle to bridge that cut, we need a cutaway.
It should go without saying, but get as many cutaways as you can. I hate contrived cutaways, but sometimes they are necessary. If the location is full of items that tell us more about the subject's character (photographs, treasured objects, awards), they can be cutaways that can add to the story. Cutaways of hands and eyes can seem arbitrary and jar. For documentaries, it's best to cutaway to sequences (archive material, rostrum work, dramatised scenes, photographs) which are intrinsic to the story.
If the interviewer is included in the scene, reporter style, then it is standard practice to shoot the notorious 'noddies' and questions, a reverse looking over the subject's shoulder and a wide shot. This is going out of style now; as audiences become more aware of these techniques, they seem contrived.
Second Camera
Now that cameras are relatively cheap, it is common to have a second locked-off camera as a cutaway camera, perhaps framed as a semi-profile of the subject. I sometimes use a BlackMagic Pocket Cinema Camera for this. Avoid crossing the line – that is, the subject should be looking in the same direction on both cameras. There was a fashion for a hand-held camera in black and white as a second camera, but that seems to have gone away. The problem is, if you are not going for a very different look on the second camera (like that funky hand-held look), then you need to take some care that the cameras match. Ideally, of course, your first and second cameras should be the same model. Is it worth the trouble? Sometimes. For example, with a subject who was particular animated and drawing diagrams as he spoke, I used a locked-off in a medium close-up, then operated the second camera on longer lens, following his hands or face as necessary.
Does it have to be an interview?
Despite all that, I still believe the most exciting forms of documentary capture life as it happens, rather than set-up for the camera. If you can tell your story through filming real events and interactions or talking to them as they go about their lives, this to me is always preferable to a formal interview. Another approach, popular in the days of film and now seeing a small revival, is to record your interviews on audio only and to use that as voice-over. People tend to be more open and forthcoming when a camera isn't present and it allows a filmmaker a lot more creativity in terms of the visual sequences to go under the words.
Read the first installment of this mini-series on interviews here: How to shoot good interviews.
Tags: Production


Comments